![]()

![]()
 |
|
|
| The Estes flying Enterprise kit was a rarity when I bought it just for the decals two years earlier. This time around, I would use an aftermarket decal sheet with the proper markings made by Decalex. The sheet includes all of the numbers and letters in their correct typeface and the Starfleet pennants seen on the secondary hull and warp nacelles. Also on the sheet are the many stripes and shapes noticable on the studio model and even the windows in their correct locations. |
|
 |
|
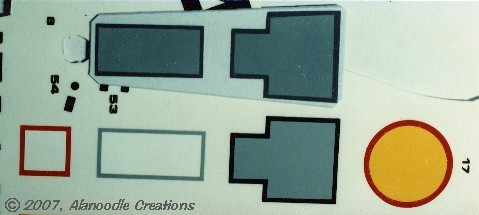
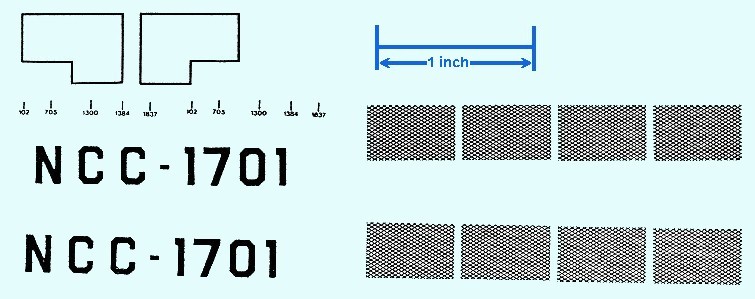
Some of the markings, as before, were photocopied onto decal film, above. The
shapes in the top-left corner were made with dry-transfer striping. The
NCC-1701 markings were made as spares after damaging one of the Decalex
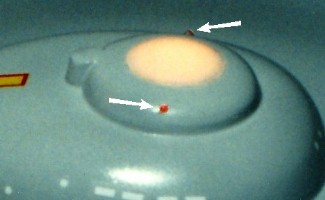
decals for the saucer underside. The blue marking was added to the photo to illustrate scale.
While the windows on the Decalex sheet were in the correct positions, I wasn't happy with the way they looked. Some were just a little too big and the edges and corners weren't as sharp as I would have liked them to be. Once again, I used the Woodland Scenics dry transfer striping and made my own window decals. |
|
|
|
Four more light mist coats of Tamiya clear were sprayed on, sanding
lightly
with 1800 grit sanding film between each coat. As before, the clear
coat
was thinned with a mix of alcohol and water to prevent any stressing on
any of the old paint beneath. Finally a coat of clear mixed with Flat
Base
was lightly airbrushed on which gave the model a satin finish and went
on without any drama.
The model was finished . . . again. |

|
|
|
|
|
|
|
|
|
|
|
|

![]()
![]()


![]()
![]()