|
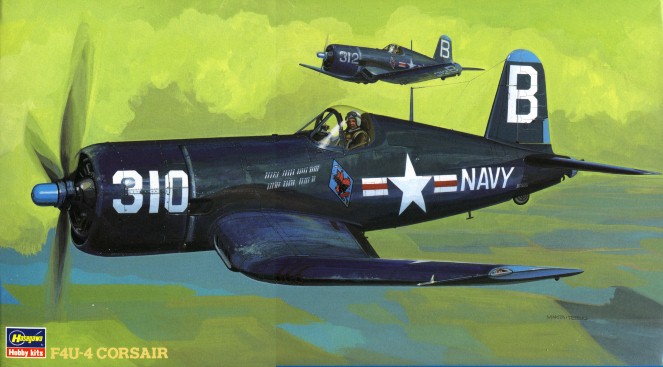
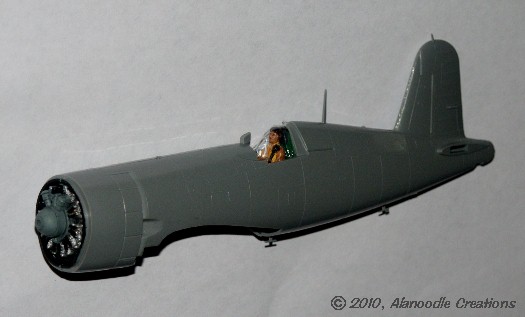
Chance Vought's F4U Corsair was an aircraft carrier based fighter plane
which saw service in the 1940s and '50s. Distinctive for its graceful
"Reverse
Gull Wings," it gained a reputation as one of the fiercest fighter
planes
of the Second World War.
My father served in the U.S. Marine Corps working as a mechanic on
F4U-4s.
I wanted to pay tribute to him with a model of one of these great
planes.
|
|
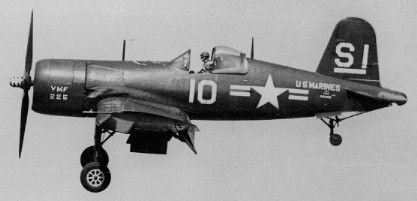
Image courtesy
Dave Gorman
|
My experience in building historical aircraft is limited compared to
other modeling genres. I wanted this model to not only be appreciated
and
displayed proudly by my father but also to be a model that showed the
same
kind of quality of workmanship that I would expect to put into a
spacecraft
or sci-fi model. I was ready to have some fun!

|
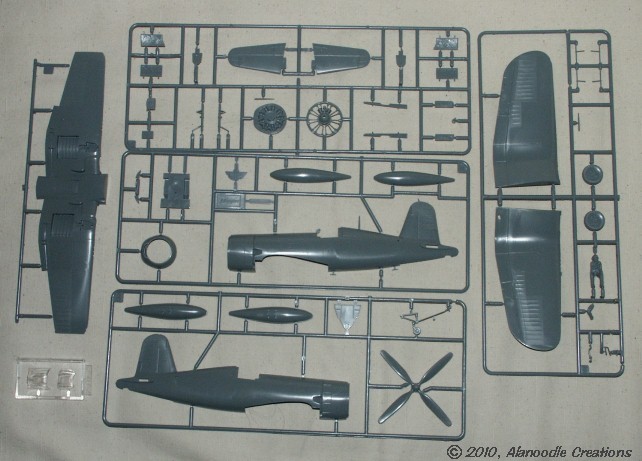
At 1/48 scale, Hasegawa's Corsair is a nice size without being a
particularly
complicated kit. The complete kit consists of 47 gray injection-molded
parts. Two more clear molded pieces make up the canopy. Molding quality
is excellent without any sink-marks or flash, surprising as the molds
for
this kit go back to the 1980s. Detail is crisp but limited to the
basics.
Panel lines are raised rather than engraved, typical of kits of this
vintage. |
|
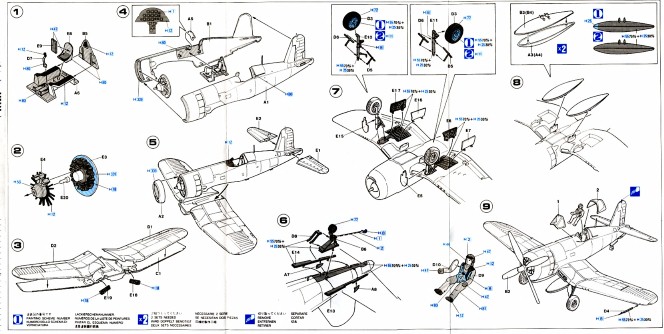
The instructions above consist of a single sheet with detailed drawings
of each step of the kit's assembly. Painting recommendations are for
Humbrol
and Mr. Color paints. Printed on the back is a brief description of the
plane and a decal placement guide.
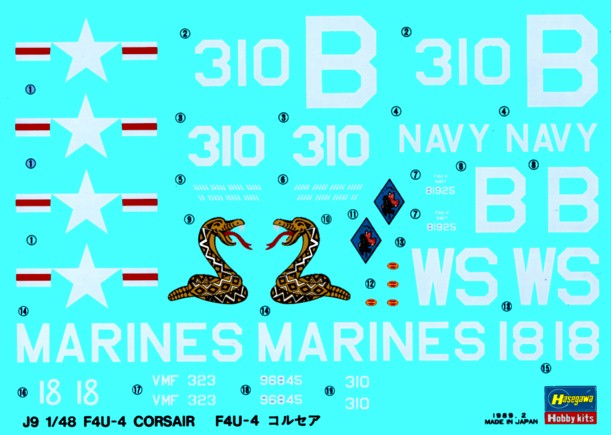
The nicely printed decal sheet below includes markings to make a U.S.
Marines
or a U.S. Navy Corsair flown during the Korean conflict in the 1950s. I was looking to model a
Corsair flown shortly after World War Two so alternative decals would
be
used.
|

|
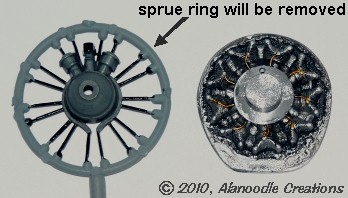
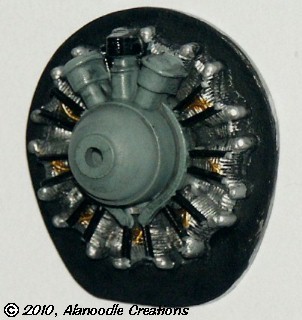
I started the kit by assembling the Pratt
& Whitney R-2800 radial engine. The engine consists of a low
profile
back piece representing the engine cylinders and a separate front
portion
depicting the engine's bullet nose and push-rods. The entire
sub-assembly
is about an inch across.
I sprayed the engine cylinders with Model Master Silver Enamel (#1246
in
a "rattle can") and gave it a wash of Tamiya Acrylic Flat Black (XF-01)
to bring out the details of the part. Flat Black was also painted onto
the engine's back plate. Fuel lines were hand brushed with Tamiya
Copper
(XF-6). The front section of the engine was airbrushed with an 8:1 mix
of Tamiya Light Sea Grey (XF-25) and Clear Blue (X-23) and then given a
wash of Model Master Flat Black (#1749). The push-rods and other
details
were then painted with Tamiya Black (X-1).
While the finished engine sub-assembly is not completely accurate, it
looks
very good and even better when placed in the nose of the plane. A more
detailed engine would be a nice touch, but most of that extra detail
would
be hidden once it was assembled into the model.
|
|
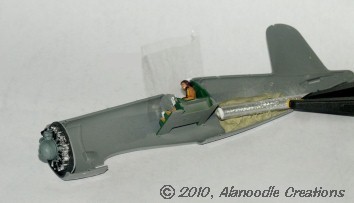
|
The cockpit is typical of older aircraft kits. The shape and overall
design
is correct but detail is kept to the most basic of representative
shapes.
Side consoles are covered with simple rectangles, circles and points
which
do roughly correspond to the locations of actual
instruments
and controls in the cockpit of a Corsair.
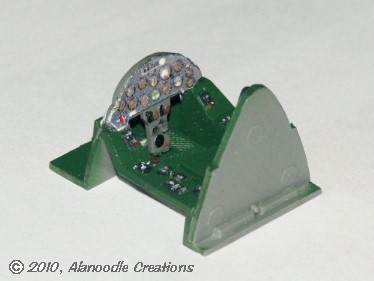 |
|
The cockpit interior was airbrushed with a 5:1 mix of Tamiya Park Green
(X-28) and Flat Black. The control stick was also painted the same
color.
I planned on building this Corsair with the canopy closed and knew most
of the cockpit detail would be hidden so I worked with what the side
panels
had to offer. Tamiya Flat Black, Flat White (XF-2) and Flat Red (XF-7)
were used. Details were hand-painted to as closely match the correct
positions
of the instrumentation of an actual Corsair cockpit as the molded parts
would allow.
The main instrument panel has some nice looking raised instrument
detail
but that detail is not even vaguely accurate. I filed off the dials, gauges
and switches and the part was sanded flat and smooth. A
color image of an actual Corsair instrument panel was printed out on
glossy
paper using a laser printer and glued on. Less than an inch wide, it
looks
really good and even better through the canopy of the finished cockpit.
|
|
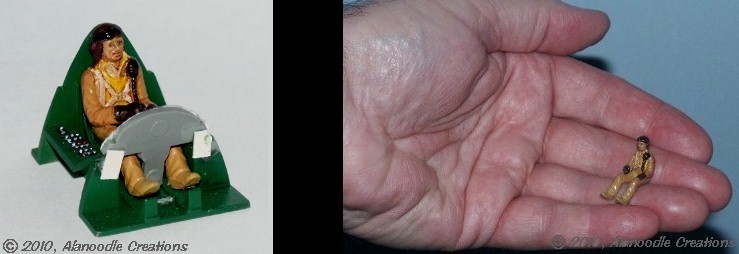
The
kit's tiny
pilot is nicely detailed. Just over an inch tall in a sitting position, its
size made it a real challenge to paint. Assisted by a 2x magnifying visor, I
was able to get a satisfactory look using a base of Tamiya acrylics.
The
tan flight
suit was colored with a 5:3:1 mix of Flat White, Lemon Yellow (X-8) and
Flat Brown (XF-10). The life vest was painted Lemon Yellow and the face
was hand brushed with a 3:2 mix of White and Flat Flesh (XF-15). The
seat
harness was painted with an 8:1 mix of Flat White and Flat Brown. The
helmet
was painted straight Flat Brown and the oxygen mask and gloves were
painted
with a 3:1 mix of Flat Brown and Black. The entire figure was then
given
a wash of Model Master Burnt Sienna to bring out details and accentuate
facial features.
|
|
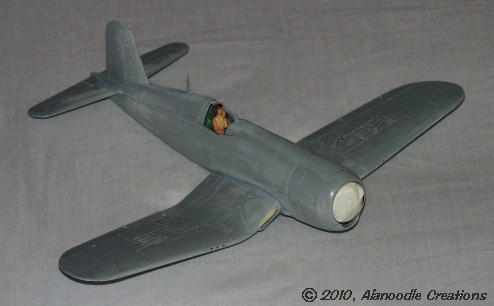
Like many aircraft kits, Hasegawa's Corsair was designed to be built
and
displayed "on the tarmac" with landing gear deployed and the gear doors
assembled in the open position. The gear doors were not meant to be
assembled
in the closed position and so did not fit into the gear bays properly.
I've always preferred to display aircraft models "in flight" with the
landing
gear up and the gear doors closed. This would require a little work.
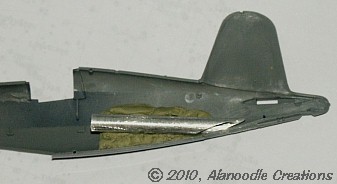
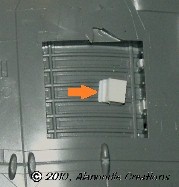
Blocks of plastic, .080-inch to .100-inch thick needed to be glued into
the gear wells to support the gear doors when glued in the closed
position
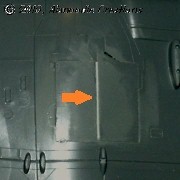
(arrow, top photo at left). While the left-side main gear doors fit
into
the gear wells almost perfectly, the right-side doors needed a spacer
of
.015-inch thick sheet plastic to fill a gap between them (arrow, middle
photo). When sanded flush, this filler piece made just enough of a step
to show the separation between the two gear doors.
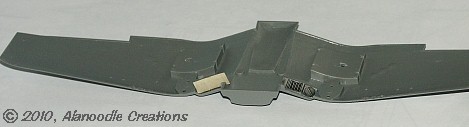
The oil cooler vents were sprayed with Model Master Silver. A wash of
Tamiya
Flat Black really brings out the details (bottom left photo). They were
glued into the wing bottom-half and masked with low-tack masking tape
before
the wings were glued together (photo below).
|
|
|
I would display
the model in a "flying" pose by suspending the model from the rear by a
1/4 inch diameter clear acrylic rod. To make this mounting as secure as
possible, I cut a section of aluminum tube with an inside diameter of
1/4
inch and used Milliput epoxy putty to hold the tube in position.
The engine and
cockpit sub-assemblies were glued into the fuselage and the two
fuselage
halves were glued together. The thin cellophane bag that held the kit
parts
was cut to mask over the cockpit for spraying the model with primer.
Once
the cockpit tub was glued into place, the cellophane was so positioned
as to be easily removed after painting.
|
|
The
tail gear,
which is designed in the kit to assemble in the extended position would
not be used. The tail-hook would be seen behind the mounting rod,
however.
It was removed from the tail gear and glued into the back of the
gearwell.
The gearwell door was then cut up to clear the acrylic mounting rod and
was glued into position.
|
The kit is designed
to represent a Korean War era Corsair and has two very delicate
antennas
on the bottom of the fuselage. Since the Corsairs of the mid 1940s did
not have these antennas, they were removed. A small mast was also
removed
from the top of the vertical stabilizer.

|
|

|
 |
|
The wing was
glued to the fuselage. Where the wing upper surface met the fuselage on
each side there was a gap which was easily filled with Model
Master
brush-on primer.
The model was primed
with the typical spray-can light gray automotive primer. Any visible
seams
and flaws were brushed with Model Master primer and sanded out.
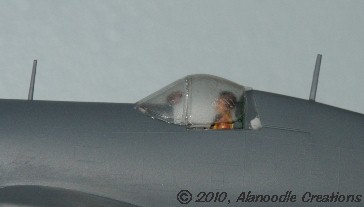
The clear canopy is
very well molded. This delicate part is very thin and strap detail is
very
crisp. It was masked off with Parafilm laboratory film to prep for
painting
and was glued into position using Elmer's white glue. The model was
ready
for painting.
|
|

|