
| Apollo
CSM 1/96 scale resin model kit by RealSpace Models and Ultimate
Apollo Command and Kit Review by Alan Nadel This review originally appeared at MundoHobby.com |
 |
|
By 1967, The United States was well into the active phase of the Apollo
program to put an astronaut on the Moon. On January 27, the Apollo 1
spacecraft
was on the launch pad, ready for the final “dress rehearsal” before
launching
into the first piloted orbital test of what would hopefully become the
first operational Moon Ship.
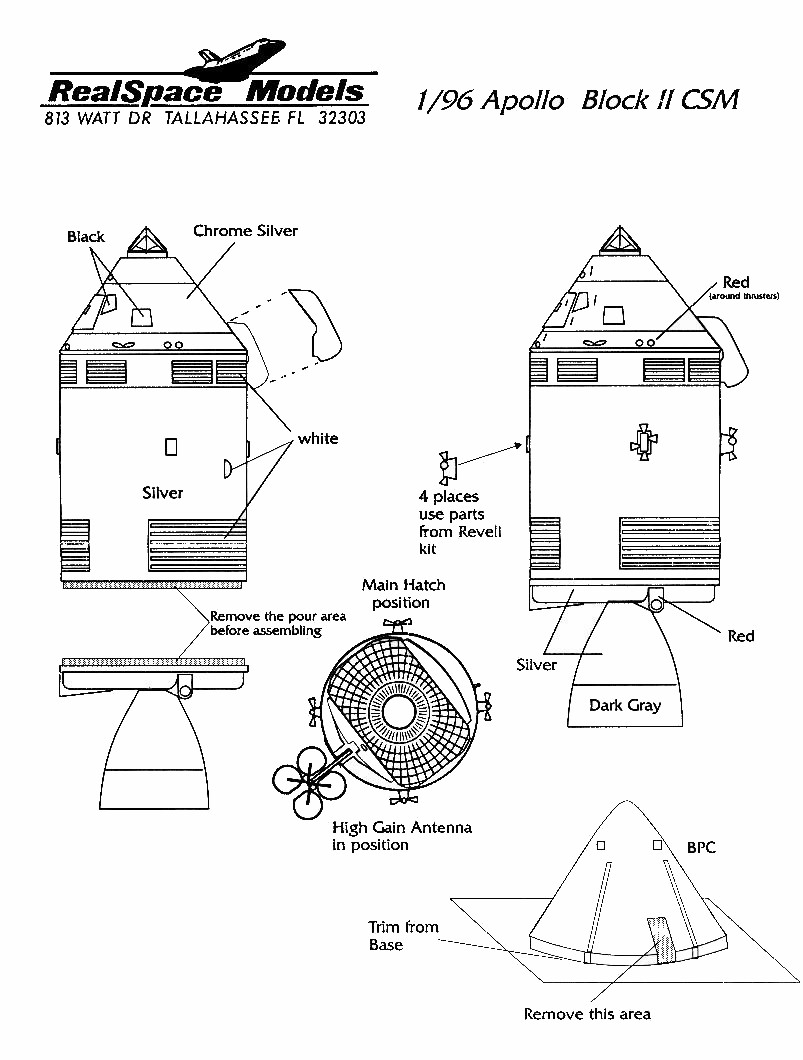
What followed was the tragic fire which killed astronauts Gus Grissom, Ed White and Roger Chaffee. This catastrophic event would force NASA to re-think safety standards and prompt the Rockwell Corp. to redesign the Command and Service Modules into what would become the Apollo Command/Service Module, Block II. At this same time, model kit manufacturers were rushing to produce kits depicting the Apollo spacecraft. What they didn't anticipate were the visible changes that would be made to the spacecraft around the same time their kits hit the shelves. This is not unusual in the modeling industry. Kits of a variety of subjects including cars and aircraft are often patterned after prototypes which may differ from production versions. Rather than retool their molds to reflect the changes which would, no doubt, be very costly, manufacturers chose to go on producing their kits of the Apollo CSM in its "Block I" form. RealSpace Models of Tallahassee, Florida has been producing highly accurate resin kits of factual spacecraft since the mid 1990s. One of their kits is a reproduction of the Block II CSM in 1/96 scale. Although it's primarily sold as a replacement for the Block I CSM that is supplied with Revell’s tremendous Apollo/Saturn V kit, I decided to build it as a companion to Heller’s 1/100 scale Lunar Module, which I had already built. I had determined that the scale difference would be minimal. Out of the box, the kit contains only four parts. The conical Command Module ("CM") is molded together with the cylindrical Service Module ("SM") in one piece. The main engine bell and Service Module heat shield are also cast together and the CSM umbilical which transferred air and power from the Service Module to the Command Module is molded as a separate piece. Also included is a vacuform plastic part representing the Command Module's Boost Protective Cover or "BPC". This conical part shielded the Command Module during launch and was carried away from the spacecraft by the Emergency Escape Tower before reaching orbit. Since I was modeling the Apollo spacecraft after launch, I omitted this part. Parts for the four Reaction Control Thruster assemblies and the four-dished High-Gain Antenna are not included. The instructions recommend using the parts from the Revell kit. I had a Heller CSM kit which was identical.
Excellent photos of the unassembled kit can be seen on a "Quick
Look" page on Sven Knudson's Ninfinger
Scale Modeling website.
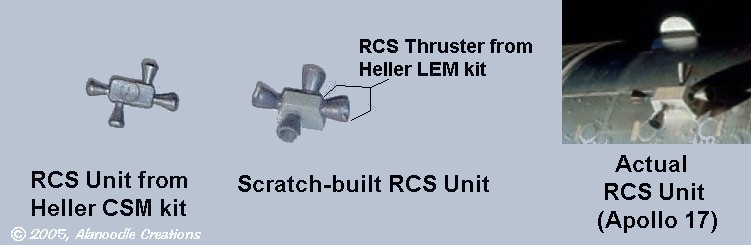
The High-Gain Antenna and Reaction Control System units from the Heller kit just didn't cut it. Both were too small and just didn't look good. I would scratch-build the RCS units, instead. In my trusty spare parts box, I found some sprue (model kit "trees") from an old model kit. Sections of this sprue were the perfect size and shape for the RCS units. The RCS thruster cones came from a Heller Lunar Module kit in 1/100 scale.
The
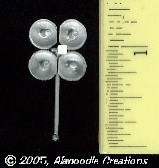
four-dish high-gain antenna was scratch-built using spare parts for the
armature and the dishes. The docking probe was made using a wheel from
a 1/72 scale Russian tank and three pieces of stretched round sprue.
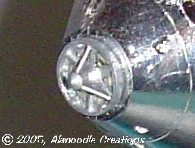
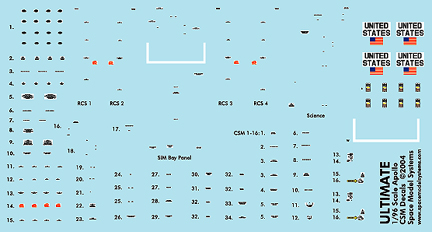
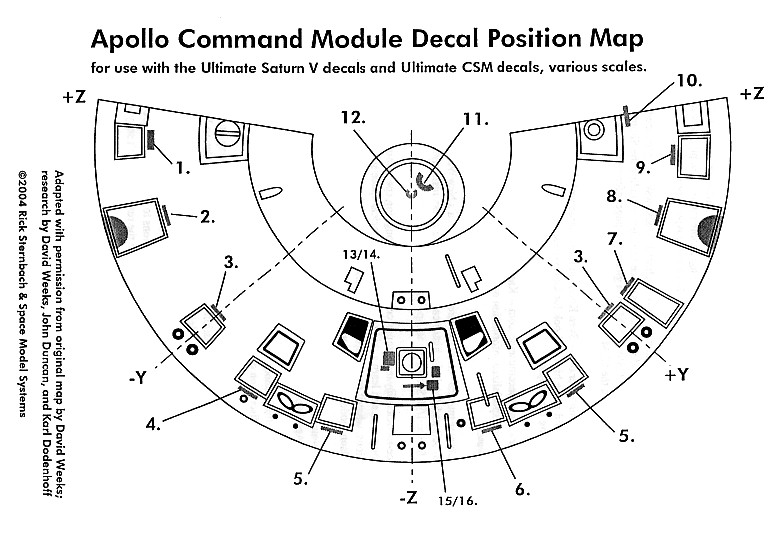
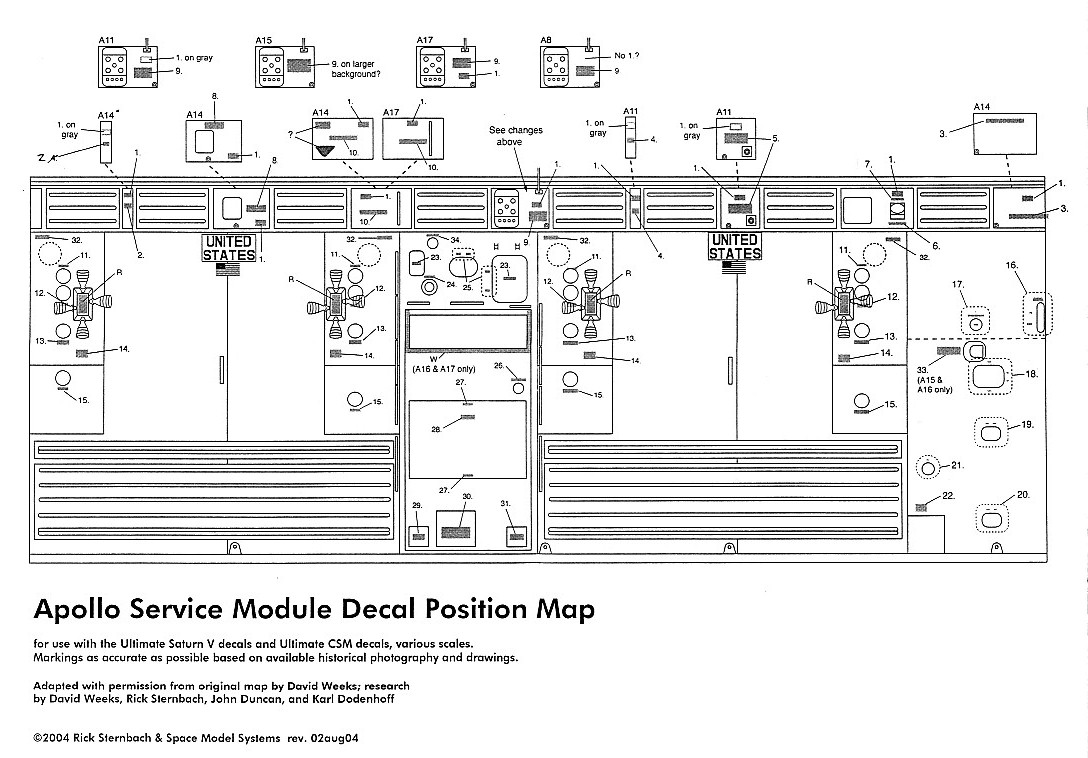
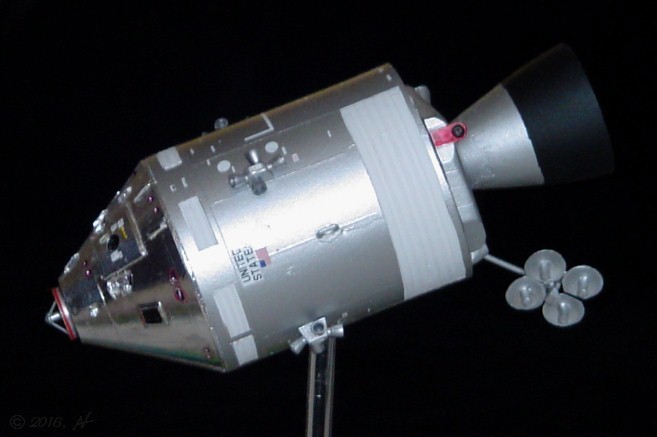
Painting the model was very simple. The CM was masked off leaving the docking probe exposed and the SM was sprayed with Flat White Krylon Primer. After that coat had dried completely, the ribbed cooling panels were masked off with Parafilm-"M" laboratory film and the model was sprayed with Model Master Chrome spray enamel. When the last coat of Chrome was almost dry, the Parafilm was removed, as was the masking over the CM. The CM was covered with Bare Metal Ultra Bright Chrome foil. I considered sanding and smoothing out the surface texture to achieve the polished steel look of the real thing but I didn't want to sand off any surface details, particularly the panel lines and EVA hand-holds. The foil followed every detail and texture of the resin beneath, bringing out the delicate raised panel work and gave the Command Module a realistic metallic sheen. The pebbled texture of the part, however, detracts from the look, making it impossible to achieve the CM's mirror finish. As with the RCS thrusters and the High-Gain Antenna, the decals from the Revell kit are meant to be used. Heller's decal consists of little more than an out-of-scale pair of American flags with out-of-register colors and "UNITED STATES" printed above.
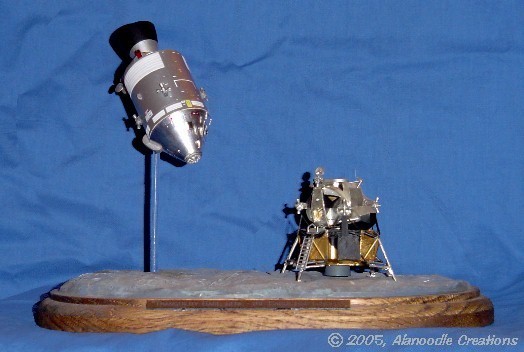
RealSpace's Block II Command/Service Module is an excellent model kit, whether used as an improvement to top off Revell's Saturn V kit or, as I built it, as a stand-alone model. With (or without) a little scratch-building, it's possible to get an accurate model of the first (and so far, only) spacecraft to carry people to the Moon.
Realspace Models' APOLLO CSM Pros: Very accurate, easy to build, well-cast Cons: Pebbled texture on the CM, fragile parts that will break if not handled carefully, recommended use of Revell RCS units and High Gain Antenna not adequate for accurate model Space Model Systems' ULTIMATE APOLLO COMMAND AND SERVICE MODULE (CSM) DECALS Pros: Decals for every Apollo mission flown, clearly printed, good color registration, thin but strong carrier film, go on easily Cons: None!
|

![]()
![]()

![]()
![]()